Showing posts with label healthy. Show all posts

Tuesday, May 12, 2015

Kitten And Grilled Chicken Sandwich

So, I've been a really bad blogger lately. I've been taking pictures sporadically but I haven't had the motivation to get on here and write about it. No worries, I have been cooking as much as usual just not translating to the web.

Also, I have been having a war of sorts with my bread making. My bread recipe has changed slightly because I have been making buns with a new recipe. When I tried to make it into bread (because I love the recipe so much) it didn't work. I have reverted to my old bread recipe that I love. The bread turned out great but STUCK in the pan GRRR!!! So much frustration! The only thing that I have found that will release my wonderful bread is to use liberal amounts of butter. Real deal butter. This is fine because I use butter in my bun recipe so I have it on hand. That's not the point. The point is that suddenly my stupid bread won't come out of the pans and it's *&%ing me off. Anyway...

I have wanted to get a recipe for hamburger buns but haven't been happy with previous attempts. While they have been nice bun recipes they weren't soft enough, they were really crumbly, or they turned out really dense. I think I have finally perfected the bun recipe. I basically make this hoagie recipe that I get from here. BUT, this time I added an egg for softness. They were PERFECT! So good. I grilled burgers to go with these wonderful buns and it was heaven!

Now I have these heavenly buns to eat, what do I do? Make a hot sandwich I guess. 

Let's take a moment to talk about our new kitten though shall we?


Her name is Skittles and we rescued her from the Mississauga Animal Services. She was 8 weeks old when we got her. We figured her birthday out to be around the time of my son's birthday. We don't know her exact birthday so we just say it is the same as Phoenix's for simplicity. She is so cute, sweet, cuddly, and CRAZY. 


You know that moment when you trip over a kitten, your foot is in the air, you have forward momentum and you now don't know where to put your feet to avoid stepping on the kitten freaking out underneath you now because you tripped on her?? No? Well you probably do if you have ever been around cats because they have this stupid habit of walking RIGHT in front of your feet while you walk. Kick the kitten, cue kitten scramble, cue fear of squashing scared kitten. Ugh! Luckily, it didn't happen on the stairs yet.

She LOVES to sleep on our shoulders or just lie across our shoulders. It will be a sad day when she is too big for her favourite spots. And by sad I mean painful because she will probably try, fall, and scratch us as she tries to catch herself. Much like she does now when she makes bad decisions and gravity corrects her.


Anyway, back to the food. I was going for a cornmeal sprinkle on these buns. It was a bit of a fail since I didn't wet the dough in anyway so they barely stuck on and just fall off ALL OVER THE DAMN PLACE. They are messy but I digress.


So first things first, toast the bun. I used my grill, some butter, and HIGH heat until I had evenly toasty buns. Add your veg and sauce. I used just mayo and lettuce at first but added some steak sauce after. So good.


Caramelize some thinly sliced onions. I used salt, pepper, and a touch of sugar. I cheated because I didn't want to wait 20 minutes for my sandwich. Sue me. They tasted great. 


Get some regular shaved chicken lunch meat. Brown it slightly and warm it all the way through.


Stack the onions on the chicken.


Stack that on the lettuce. Tomato would be totally wonderful on this too but I didn't have any big ones, just little cherry ones.


The finished product. It was so good!! 


I highly recommend taking the time to a) toast the bun and b) grill some onions. It totally took this sandwich beyond regular cold cuts to a warm loving embrace.... what? You know what I mean. Enjoy!

Friday, April 10, 2015

Homemade Tomato Soup ~ Jamie Oliver Recipe


Recently, I had a great experience with home made croutons and canned tomato soup. I figured that home made soup would have to be better than the canned version which is loaded with salt, sugar, and whatever else they put in that stuff. So, off to my cookbooks I went and this is what I found. I was surprised to see it called for a lot of veggies. This could only be delicious.

Peel one medium carrot, finely chop two stalks of celery, several garlic cloves, and one onion. Start softening them together with some oil in a nice large pot. Avoid adding salt at this point. Add lots of pepper if that is your thing.


I used my mini food processor for this.


The recipe called for two cups of chicken stock. I used these packets plus two cups of water.


Once your veggies are soft and flavourful, start adding in the liquids. One can of tomato sauce. Organic because why not.


One can of whole tomatoes and juice.


Several ripe tomatoes, quartered. 


It looks like a chunky soup right now. Let is cook the tomatoes and heat everything through.Test for seasoning at this point. Canned tomatoes, tomato sauces and the chicken stock will all have salt. Be sure not to add salt until after these are all added. Plus, I like croutons and cheese on my soup which also add salt so go easy.


Using a blender or a hand blender, completely blend the soup until it is creamy and smooth.


Top with garlic croutons and shredded Parmesan cheese.


This soup is much healthier for you than the canned version. You can completely control the salt, fat, and spices to suit you. Also, you can feed a crowd with this recipe. Don't be scared to make soup from scratch, it is totally worth it!

Thursday, April 9, 2015

Homemade Corn Tortillas

Over the past few years I have seriously developed my love of Mexican food. This is a food I have always loved but never tried to make it at home aside from the boxed meals, you know the ones I mean. Chris got me started on making Mexican food from scratch. One important thing I have learned from making more authentic Mexican foods at home is that you can specialize them to your own tastes. Sure, this probably makes them less authentic but 100 times even more delicious. Of course, you might as well make your own tortillas too, why not? Everything is better homemade right?

You will need a special type of flour called Masa Harina. It is ground corn. More specifically it is a corn that has been soaked in lime, dried, then ground. You can find it in the ethnic section of your grocery store.


This dough is super simple, it is just water added to the Masa Harina until a dough forms. It will dry out easily so you need to keep the dough covered while you form your tortillas.


You will need to roll these out by hand unless you happen to have a tortilla press. Be sure to use plastic wrap to cover your press or you will have a mess. One piece each for the top and bottom.


Roll a bit of the dough into a ball and place it more toward the hinge instead of the center. You'll see how the press pushes the dough outward. If you put it right in the center it will smoosh off the end of the press and make a mess.


Now press and there you go, one flat disk of dough.


Now to cook. On pretty high heat, cook until browned slightly on both sides.


There is a nice little stack.


Now for the real reason I made tortillas, quesadillas. I used left over tangy slow cooker pork and cheese. Put that between two homemade tortillas and heat until the inside is hot and gooey.


Be sure to flip.


Top with salsa, lettuce, tomatoes, and avocado. Sour cream would be great as well. These are so tasty and really so easy.


Tuesday, April 7, 2015

My Favourite Salad

About five years ago I went on a weight loss journey. A major weight loss journey. 80 lbs later here I am a fitter, lighter, happier version of my former self. I blame good foods and no self control for all the extra weight I was carrying. The thing was, most of the foods I was eating regularly didn't even taste good to me any more.  They were satisfying my fat and salt cravings and they were really easy to make.

This salad became part of my weight loss repertoire. I made and ate this salad for days on end and never tired of it. It's salty, it has healthy fat, it's crunchy, and most importantly it's tasty! With very little prep you can have a weeks worth of lunches and sides for supper in your fridge. It takes the pain out of deciding what to eat for healthy eating.

One of the key components to this salad is the dressing. You can find the recipe here. This recipe makes a lot of dressing. Make it in a jar and keep it in the fridge. I use this dressing on everything, it's that good.


Healthy olive oil makes this recipe good for you and satisfying.


Shake it up and keep it in the fridge. Shake it gently or the oil will solidify. If that happens to you just be sure to take your dressing out 10 minutes ahead of serving to let the oil warm up to room temperature again.


This salad is usually made with cabbage but I'm using romaine this time.


Now the veggies. Use whatever you have. I like to make this to the recipe but the dressing is really what makes this. The salad is just there because drinking salad dressing is gross. Haha. One thing to be sure to get is the bean sprouts and red onions. The rest is very flexible. If you are making this salad for the week keep back the watery veggies like the bean sprouts and tomatoes. Add them just before you eat to keep your other veggies from getting soggy.


This salad is tasty, beautiful, and HEALTHY. It is surprising how good it is for you.


I would normally eat this salad as a meal or with lean protein. I served it along side Sarah's Slow Cooker Pork for a fresh hit of clean flavours. The salad dressing is even good on the rice. Seriously, you will find so many places to use the salad dressing, it really is the star of this salad.


Wednesday, April 1, 2015

Pad Thai at Home

I love food. This is something that you should know about me. I love cooking, I love baking, I love looking for new recipes and remaking my old favourites and of course EATING! I love trying new foods, especially favourites from other cultures. One of my all-time favourites is Pad Thai. My first experience with Pad Thai was from Thai Express, which I highly recommend.  But for those times you don't go to Thai Express and want to cook at home, here is a Pad Thai for you!

Looks good doesn't it?!


You will need some type of rice noodle.  This time I used the flat sticks but I like the long rice vermicelli best.


Get your pans ready. Hot water on the boil for the noodles and get your wok screaming hot.


This is where the magic comes from. If you look up Pad Thai recipes they have at least 20 ingredients. This is probably half of them!


The finishing condiments are very important for this dish. Thai Express will serve lime, Sriracha, and chopped peanuts on the side. I didn't have any peanuts but I added crushed chilies for extra heat.


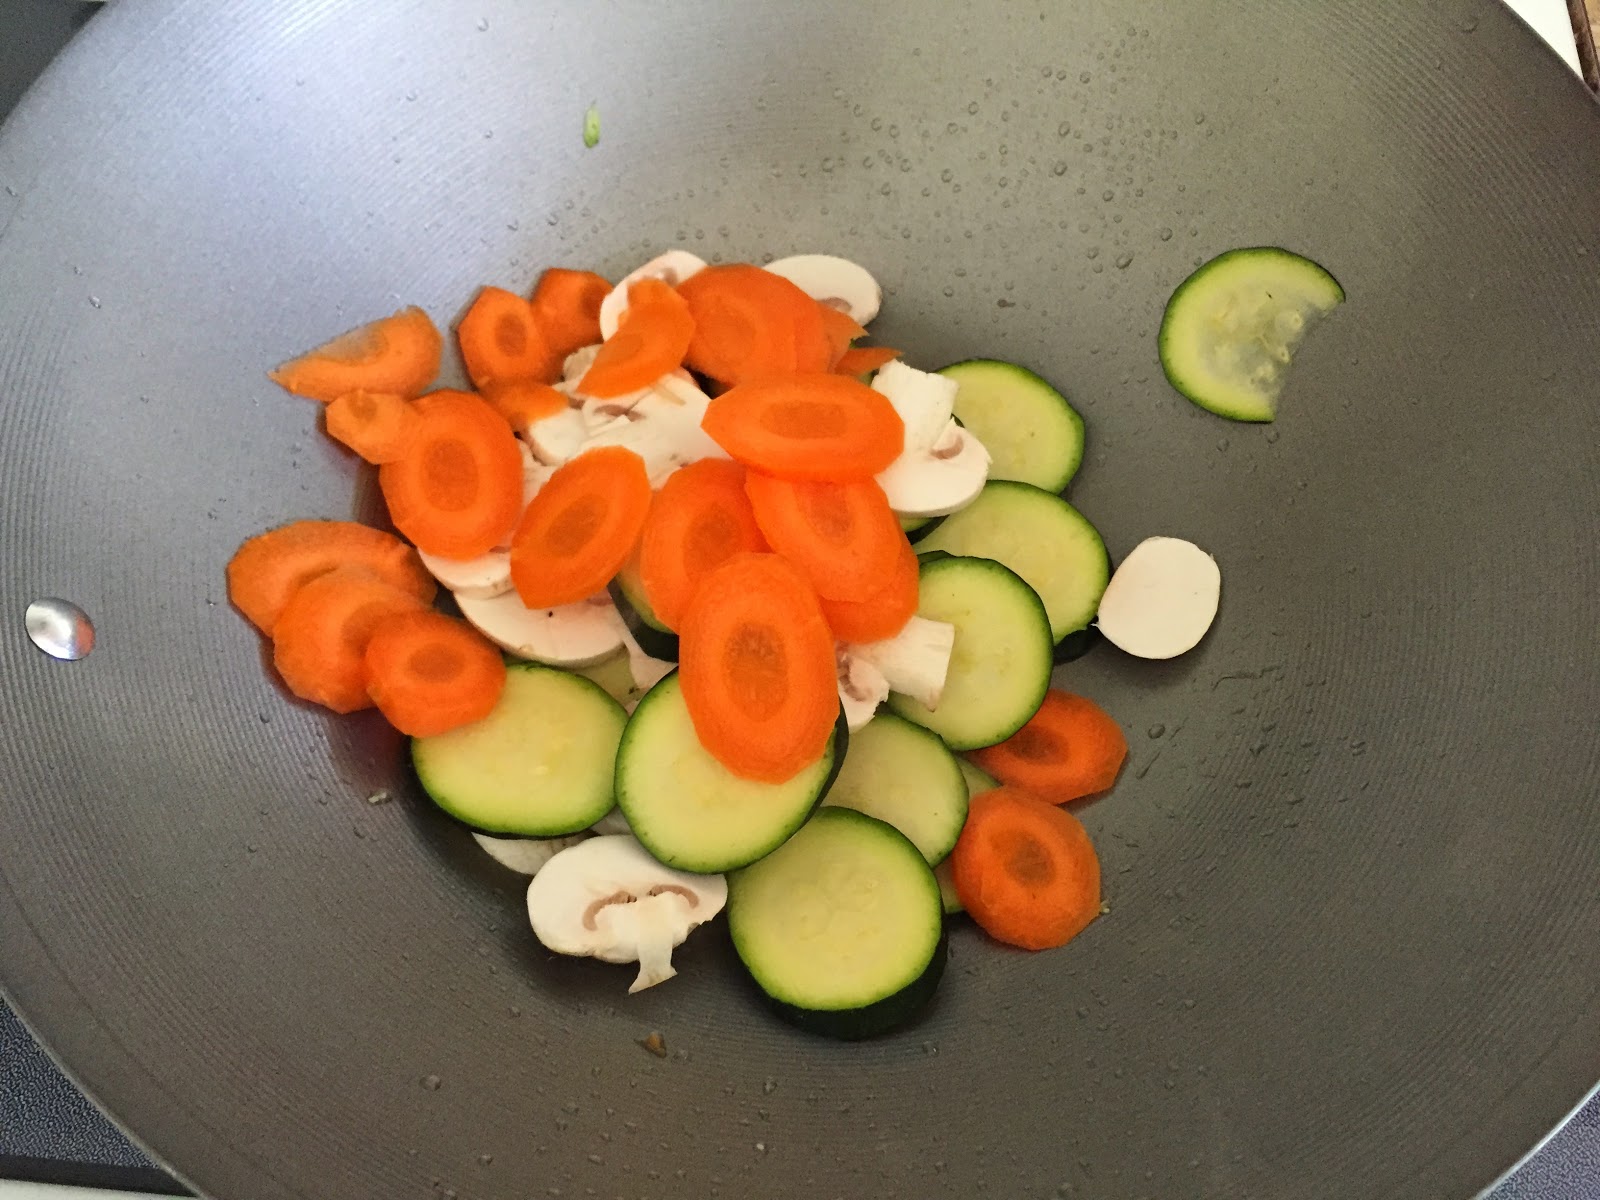
Prepare your ingredients. One egg, beaten, big handful of bean sprouts, zucchini, green onion, and mushrooms. I made this vegetarian but you would usually have beef or chicken cut up very thinly.


I also added carrot, thinly sliced.


The water should be boiling, drop your noodles. These rice sticks will take a few minutes to cook so you'll want to start them first. If you are using rice vermicelli you will want to drop them closer to the end of the cooking time because they take way less time. You can also just pour boiling water over them and let them sit until you are ready to add them. The package will tell you the best cooking method.

Once the wok is hot, add oil, let it start smoking and add the egg. Using chop sticks move the egg around in the hot oil. It will form longish scrambled ribbons. As soon as the egg has started to set but is still soft (not runny though) move it back to its bowl. Don't worry if they aren't fully cooked, you will finish cooking them later.  The important thing is to not burn them.

Add more oil and then add in your longest cooking veggies.  In this case it would have been the carrots but they were sliced very thinly so I put everything in at once.  Keep back the green onion and bean sprouts.


Let the veggies cook a bit until they start to soften.


Next you'll add 6 Tbsp of the pad Thai sauce. Your noodles should be partially cooked if not mostly cooked by now. Add them now but keep their water to add to the sauce later if necessary. Add in the soft egg scramble and toss everything together. Sorry for the steamy photo here!


Oh my, look at that!  Once your noodles are completely cooked add in the bean sprouts and green onion. If your pad Thai is getting too sticky add in some of the cooking water from the noodles. The noodles will keep taking up moisture so add water as you go. I also like a bit of a saucier pad Thai so adjust to taste as well.


Time to dress the dish and eat! Add dried chilies, Sriracha, and lime. Serve with chop sticks and enjoy!


The most of the cooking time is taken up with the prep for this dish so make sure you get everything ready before you start your wok or you'll have something burn and it will not be nearly as tasty.