Showing posts with label simple. Show all posts

Tuesday, May 12, 2015

Kitten And Grilled Chicken Sandwich

So, I've been a really bad blogger lately. I've been taking pictures sporadically but I haven't had the motivation to get on here and write about it. No worries, I have been cooking as much as usual just not translating to the web.

Also, I have been having a war of sorts with my bread making. My bread recipe has changed slightly because I have been making buns with a new recipe. When I tried to make it into bread (because I love the recipe so much) it didn't work. I have reverted to my old bread recipe that I love. The bread turned out great but STUCK in the pan GRRR!!! So much frustration! The only thing that I have found that will release my wonderful bread is to use liberal amounts of butter. Real deal butter. This is fine because I use butter in my bun recipe so I have it on hand. That's not the point. The point is that suddenly my stupid bread won't come out of the pans and it's *&%ing me off. Anyway...

I have wanted to get a recipe for hamburger buns but haven't been happy with previous attempts. While they have been nice bun recipes they weren't soft enough, they were really crumbly, or they turned out really dense. I think I have finally perfected the bun recipe. I basically make this hoagie recipe that I get from here. BUT, this time I added an egg for softness. They were PERFECT! So good. I grilled burgers to go with these wonderful buns and it was heaven!

Now I have these heavenly buns to eat, what do I do? Make a hot sandwich I guess. 

Let's take a moment to talk about our new kitten though shall we?


Her name is Skittles and we rescued her from the Mississauga Animal Services. She was 8 weeks old when we got her. We figured her birthday out to be around the time of my son's birthday. We don't know her exact birthday so we just say it is the same as Phoenix's for simplicity. She is so cute, sweet, cuddly, and CRAZY. 


You know that moment when you trip over a kitten, your foot is in the air, you have forward momentum and you now don't know where to put your feet to avoid stepping on the kitten freaking out underneath you now because you tripped on her?? No? Well you probably do if you have ever been around cats because they have this stupid habit of walking RIGHT in front of your feet while you walk. Kick the kitten, cue kitten scramble, cue fear of squashing scared kitten. Ugh! Luckily, it didn't happen on the stairs yet.

She LOVES to sleep on our shoulders or just lie across our shoulders. It will be a sad day when she is too big for her favourite spots. And by sad I mean painful because she will probably try, fall, and scratch us as she tries to catch herself. Much like she does now when she makes bad decisions and gravity corrects her.


Anyway, back to the food. I was going for a cornmeal sprinkle on these buns. It was a bit of a fail since I didn't wet the dough in anyway so they barely stuck on and just fall off ALL OVER THE DAMN PLACE. They are messy but I digress.


So first things first, toast the bun. I used my grill, some butter, and HIGH heat until I had evenly toasty buns. Add your veg and sauce. I used just mayo and lettuce at first but added some steak sauce after. So good.


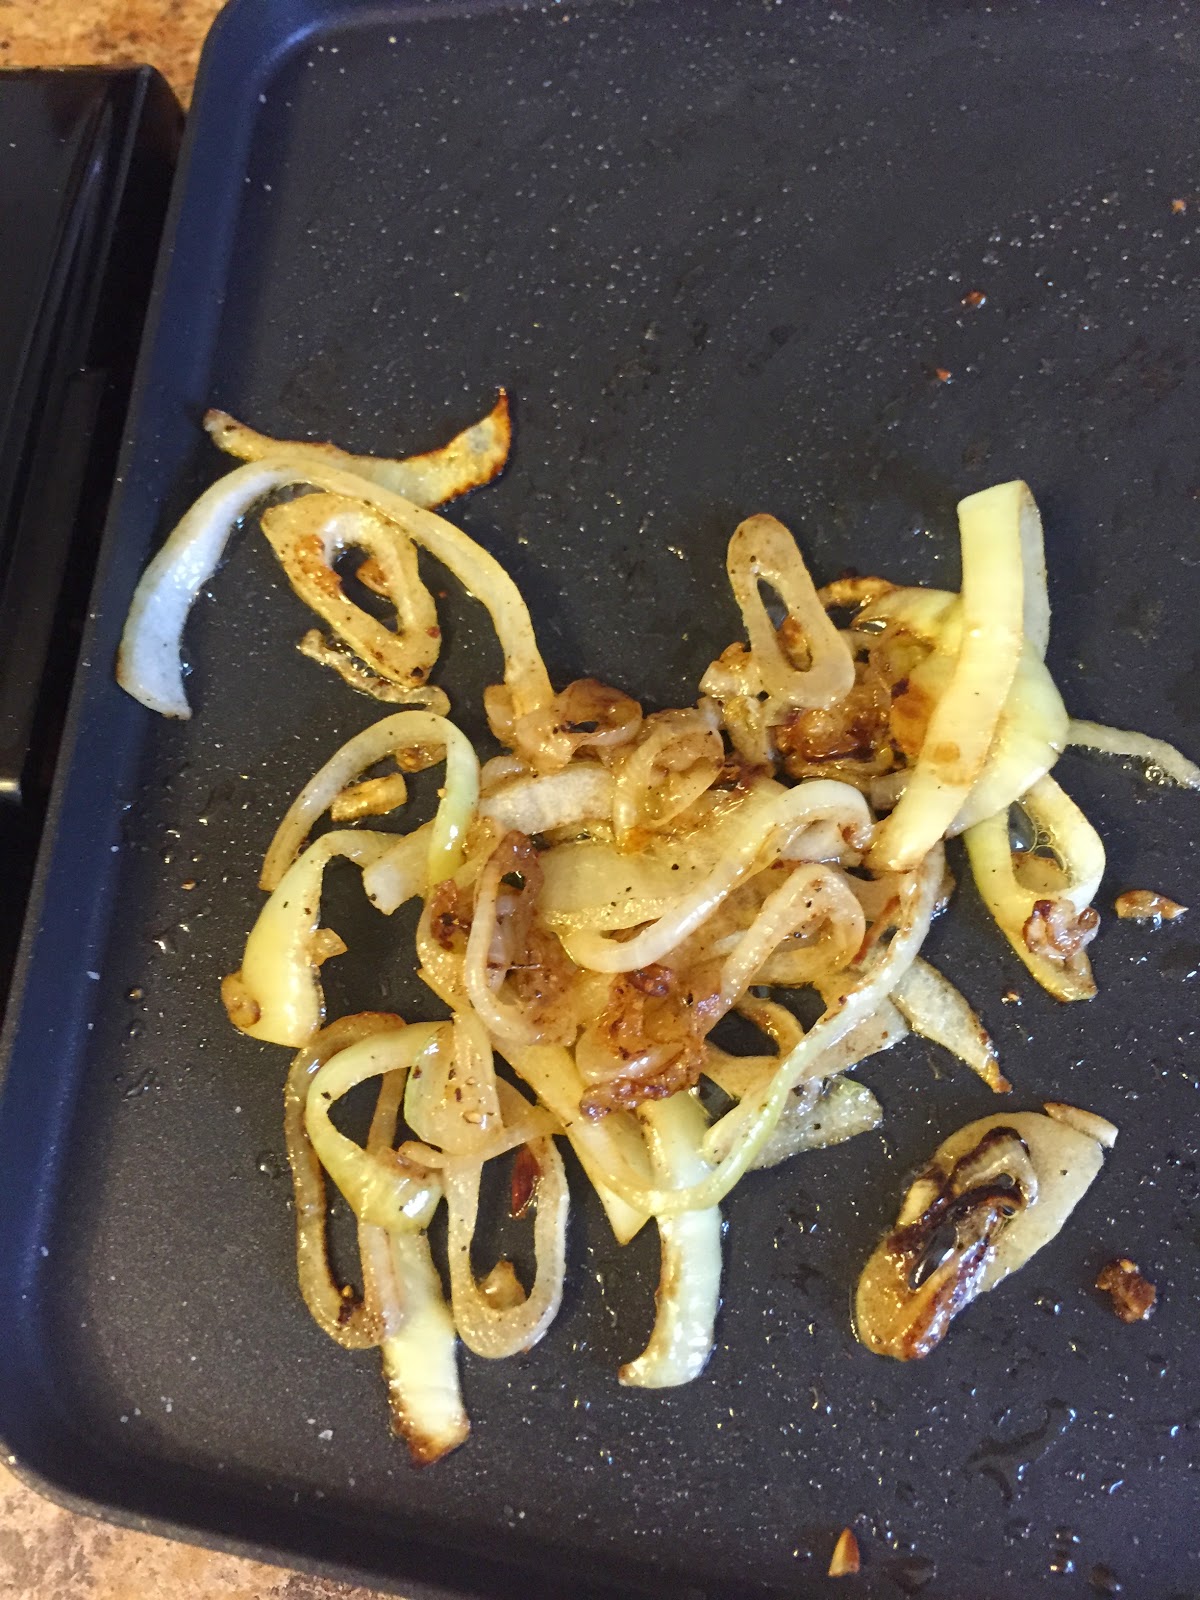
Caramelize some thinly sliced onions. I used salt, pepper, and a touch of sugar. I cheated because I didn't want to wait 20 minutes for my sandwich. Sue me. They tasted great. 

Get some regular shaved chicken lunch meat. Brown it slightly and warm it all the way through.


Stack the onions on the chicken.


Stack that on the lettuce. Tomato would be totally wonderful on this too but I didn't have any big ones, just little cherry ones.


The finished product. It was so good!! 


I highly recommend taking the time to a) toast the bun and b) grill some onions. It totally took this sandwich beyond regular cold cuts to a warm loving embrace.... what? You know what I mean. Enjoy!

Thursday, April 23, 2015

Stuffed Peppers and Homemade Burgers

It is definitely getting to be BBQ weather. Well it would be if we could stay above zero for long enough. I put together some burgers but couldn't be bothered to start up the BBQ so I grilled them inside on my breakky grill. It was great because I could get some char on the burgers but it was definitely missing the smokey element from the BBQ. To be honest, I didn't miss it this time.

On a more personal note, have you even done something that scared the hell out of you? You know that stressful feeling you get? You know that feeling when the situation is finally over and the stress is released? Yes? Well that is me today. Celebrate! I might even get my butt out the door tomorrow and run again. Well, at least if it isn't freezing I will.

I know that stuffed pepper recipes usually call for some ground meet but I knew I was going to make burgers so I went for a vegetarian stuffing and that means mushrooms!

I roughly chopped about a dozen medium sized mushrooms.


To make the peppers stand up, trim off a bit of the bottom, set aside. Lob the tops off the peppers and clean out the seeds and membranes. Finely, chop up the top and bottom bits with an onion. Sweat them down in a pan with some oil and season well with salt and pepper.


Meanwhile, cook about 1/2 cup of rice with one cup of water.


I only wanted to make three peppers so I halved the recipe I was following. Don't worry if your peppers get some holes when you trim them up. Set the peppers into an oven safe dish that is just big enough for them. I used a bread pan.


Once the peppers and onions have softened, add the mushrooms.


Cook down until the moisture is cooked out of the mushrooms.


Once the rice is cooked, toss with the veggies.


Stuff the peppers. Cover and into the oven for 20 minutes at 375F.


Time to start the burgers. Toss one packet of onion soup mix into a big bowl.


Grab your ground beef and an egg.


I weigh and press my burgers to be sure they are all the same size and thickness. Normally, I would put these onto the BBQ but it was cold out and I wanted to use my breakfast grill. It was messy and smokey but the burgers turned out great. Not sure if I won or not. Haha 


To finish off the burgers I slathered some BBQ sauce on and added a couple slices of cheddar cheese. I covered the burgers to let the cheese melt. I served them on my homemade buns.  I put a few slices of cheese on the peppers and broiled them on high for a few minutes until the cheese was bubbly. Enjoy!


Wednesday, April 8, 2015

Tangy Slow Cooker Pork

I must say up front that this was not my favourite recipe. It had all the components of recipes I like. It was easy, it built up flavour, and it had familiar ingredients. In the end, it was missing something for me. I would make this again but I would change it up and add more spices. I pulled this recipe out of a random cookbook on my shelf as part of my desire to cook from the books I already. I would say this was a 6/10 for me. My family liked it, however, so maybe it was just me.

Start with a seasoned flour coating for your pork roast. This was just salt, pepper, and paprika.


Heat up a bit of oil in a pan. This is to build the crust.


There is the star. This is a very lean cut of pork, as you can see, and but it takes flavour really well. It is pretty much a blank slate to be built upon.


Cover your roast completely in the seasoned flour.


And start browning. The heat should be high enough that you get a nice golden colour but don't let it burn. Make sure to get some colour all over.


Prepare your veggies. They just get a fine dice and set aside for now.


Keep turning your roast.


Nearly there!


Now for the sauce. Move the roast to the slow cooker and add the veggies to the hot pan. Soften the veggies and add a can of tomato sauce. Slow cook for 5 hours.


After 5 hours, the sauce comes out thick like a gravy.


The meat is very tender.


I served this with mashed potatoes. My secret weapon for mashed potatoes now is to use buttermilk. Do it, you will LOVE the extra zip and creaminess.


I think in the future I would add sugar to the sauce as I found the tomato flavour to be a bit on the bitter side. It was good but not exactly what I was expecting.

Thursday, April 2, 2015

Veggie Pancakes?

When I was staying with John and Chrystal last year, John's mom came to visit. She cooked some really great food. This dish was my attempt to recreate one of her dishes. I didn't even come close but this still tasted pretty good. I will get the real recipe and try again some day but these satisfied my itch for them for now. 

Scrumptious. Salty, savoury, soft and chewy, crispy, and fresh. This dish is a sensory overload.


When this dish was made for me it was done with shrimp.  It was so good but alas, no shrimp in my house at the moment so I went straight up vegetarian.  I'm sure you could put anything in these and they would be tasty but I wanted to keep it kind of simple.  I only used mushrooms, green onions, zucchini and bean sprouts.


Now, this is where I went awry. I could not remember what was in the batter except cornstarch so I basically altered my crepe recipe. One egg, milk, and flour.  I wanted a really loose batter so it would be thin and cook quickly.


Cornstarch gives a really good crisp crunch in batters so it was the star here. I ended up using about two Tbsp because that is what pouffed out of the container and into my bowl. It worked for me.


If I remember correctly these were served with fish sauce and soya sauce. I like heat so I set out chili flakes so I would remember to add them. The fish sauce portion of this dish might have been mixed with something else. I am really not sure. My memory is my weakness.


To test my batter I fried a bit in some hot oil. It was sure crispy. I thought it would do.


Time to get cracking. Add oil to your very hot wok, throw in your veggies. Cook stirring constantly until they start to soften.


Pour your batter right on top. Shake and tilt the wok so all the 'raw' batter from the middle goes to the edges to be cooked. It will form a big crepe looking pancake thing. Very technical.


Now the hard part, flip that whole thing before it burns without it falling apart. Cook the other side for a minute or so, checking often to be sure the bottom is not burning. Partially remove from the heat if your pancake is cooking too quickly.


Turn it out onto a plate and eat immediately. This was really fun to cook because I stopped to eat every one while it was hot. While it is still hot, splash soya sauce, fish sauce, and chilis on top then eat and enjoy. Add more sauce as required.

Because I was eating every pancake as I was cooking it, I experimented a bit to see if I could improve my technique. I tried batter in first and batter on top. Batter on top was definitely best. Plus, the veggies developed more flavour getting to cook a bit on their own first.


John's mom also made this really wicked curry soup and I still need to get the recipe. I love trying new foods, especially when they are this yummy!

Tuesday, March 31, 2015

Making Yogurt

I have been obsessing over this book lately.  In it, the author tests which food products we should buy or make based on quality, effort, and cost.  I was very intrigued by the cheese section where she makes different cheeses.  Some of the cheeses she makes take a lot of time, special cultures ordered from a cheese making company and I'm just not up to that yet.  She also made yogurt.  It is so easy, I gave it a go.  To go with the yogurt the author made a lemon curd.  I'm not a huge fan of lemon but Chris and Phoenix are so I thought I'd give it a try.  To be honest, making the curd was the most difficult part of the yogurt making process.

First you need to get yogurt with active bacteria cultures.  It will be listed as an ingredient.  I used Activia.  It also happened to be raspberry since I didn't have plain yogurt.  The recipe calls for 1/4 cup of yogurt and 1/2 gallon of milk.  You can use any type of milk (even soy milk).  I used 1.3 L of 1% milk from the store (one bag as we buy it here).

Warm up the milk to just below a boil.  Let it cool until it is still warm but not too warm.  It should be about the temperature of water you would start bread yeast at so about 110 - 115 degrees F is recommended.  Stir in the store-bought yogurt (or yogurt from previous batch of home-made) and let this sit covered with a towel. Leave it over night in a warm place.

I had put this in my oven when it was still slightly warm after making bread.  I later decided to clean my oven and nearly cooked my yogurt to death!  After the mad scramble to get my yogurt out of the oven set to self-clean, I let my yogurt sit on top of the stove while the oven was being cleaned.  I put the pot on my spoon holder so it wouldn't get any direct heat as the top of my stove got pretty warm.

In the morning I woke up to yogurt.  It's hard to see but if you look around the edges you can tell the milk has solidified and is pulling away as I tilt the pot.


See the slight ripple on the surface?


You can eat the yogurt as is if you like runnier yogurt (like regular store-bought yogurt).  I prefer Greek style yogurt and I had a mesh bag from jam making so I drained my yogurt for a couple hours.  You can use a cheese cloth, clean pillow case, anything that will let the moisture seep out while holding back the solids.  Keep the whey that drains off the yogurt for making bread.


Over time you will get quite a bit of moisture come off your yogurt and it will then settle and separate.  I kept the whey in the fridge (for about a week) and just recently used it up making bagels, buns, and sourdough bread.  Refrigerate the yogurt when you get the thickness you want.


Now to make the curd to go with the yogurt.  Set up a double boiler.  The bottom has a pot with a couple inches of water.  Keep an eye on the water below, check every so often to be sure it isn't boiling like crazy and you definitely don't want to run out of water.  It should be a nice rolling boil.


The top has a heat safe bowl. For the curd I followed the recipe in the book.  Equal parts (1/2 cup) lemon juice and sugar plus 3 eggs.  The recipe calls for fresh lemon juice and zest.  I used bottled and it was good.  Whisk this constantly.  It will thicken and lighten in colour.


Get ready to strain your curd so it is nice and smooth.  I strained into a measuring cup because I wanted to put a curd layer in the bottom of serving bowls and put yogurt on top.  The measuring cup has a spout for easy pouring.


Once your curd has stopped thickening, cook for several more minutes to be sure the eggs are cooked and then strain the curd.


Pour into waiting bowls, cover and refrigerate until completely cooled.  If you don't have bowls with lids use plastic wrap and place the plastic wrap right on the surface of the curd before cooling to avoid having a skin form.


Once your curd and yogurt have chilled completely you can assemble your yogurt pots (or eat now).  I hadn't stir my yogurt at all at this point so it appears lumpy.


Once you stir the yogurt it gets smooth and creamy.  Don't mind the raspberry seeds.


See how smooth and rich these look?  They are not very rich as all but they do have a creamy texture and very mild tang.


The curd was very tart and slightly sweet.  It was very nice.  I found that about 1/3 curd to 2/3 yogurt was nice.  Phoenix liked more yogurt and less lemon.  Play around and find your perfect mix.  I also liked to dig to the bottom with every spoonful to get just a bit of curd and mostly yogurt on every bite but Phoenix liked his mixed up.  


This experiment was very satisfying!  I have very small canning jars that I put the rest of the curd and yogurt in and have been sending them to school in Phoenix's lunch.  We have been eating them for breakfast and snacks as well.  This recipe would have made 8 of these small sized jars.  I ended up splitting the ones I made at first in half as it was too big of a serving for one person unless you REALLY like lemon yogurt.


Also, if you like how your yogurt went, be sure to keep back 1/4 cup (or one pot) to make the next batch.  Your yogurt should keep for about a week in the fridge.